
Sky Pond Trail Hiking Guide: Route, Difficulty, Tips & Nearby Alpine Lakes
Sky Pond Trail is one of the most rewarding hikes in Rocky Mountain National Park. The trail takes you through forests, past waterfalls, and along several beautiful alpine lakes before reaching the stunning Sky Pond. With rocky mountain peaks surrounding the water, the final view feels well worth the effort.
This hike is not an easy walk, though. The trail includes steep sections, rocky terrain, and a challenging climb near Timberline Falls. Good preparation is important, especially if you are not used to hiking at higher elevations.
In this guide, you’ll learn what to expect on the Sky Pond Trail, how difficult the hike is, what to bring, where to start, and the best time to go. We’ll also cover nearby alpine lakes and optional additions such as Lake Haiyaha and Emerald Lake, so you can decide how much of the area you want to explore.
What to Know Before Hiking the Sky Pond Trail
Before heading to Sky Pond, it helps to know what kind of hike you are taking on. The trail is long, has a good amount of elevation gain, and includes rocky sections that can be slippery or difficult in wet or icy conditions. You should be comfortable with a challenging mountain hike before choosing this route.
Start early if you can. Parking near the trailheads can fill up quickly, especially during the busy summer season. An early start also gives you more time to enjoy the lakes and reach the higher sections before afternoon weather becomes a concern.
Weather can change quickly in Rocky Mountain National Park. Even on a warm day, temperatures near Sky Pond can be much colder than at the trailhead. Check the forecast before leaving and bring layers, plenty of water, food, and proper hiking footwear.
You should also check the park’s current entry and road conditions before your trip. Seasonal access rules, reservations, and shuttle services can change, so confirm the latest information with the National Park Service before setting out.
What to Bring
Sky Pond is a strenuous mountain hike, so packing the right gear can make the day much easier. Bring sturdy hiking shoes or boots with good traction, especially because the rocky section near Timberline Falls can be wet or slippery.
You should also carry plenty of water, snacks, sunscreen, sunglasses, and a hat. Layers are important because temperatures can change quickly at higher elevations. Hiking poles can also be useful on the longer sections and during the descent.
If you are hiking when snow or ice may still be present, check current trail conditions before leaving and bring traction equipment if needed.
Sky Pond Hike Stats
Here are the basic numbers to know before planning your hike:
- Trail type: Out-and-back
- Distance: About 9.8 miles round trip from Glacier Gorge
- Highest point: About 10,900 feet
- Difficulty: Strenuous
- Trailhead: Glacier Gorge Trailhead
- Main highlights: Alberta Falls, The Loch, Timberline Falls, Lake of Glass, and Sky Pond
- Dogs: Not allowed on park trails
The exact distance can vary depending on your starting point. The National Park Service lists Sky Pond at 4.9 miles one way from Glacier Gorge, with about 1,710 feet of elevation gain.
If you start from the larger Bear Lake parking area instead, expect a little extra mileage. The high elevation and rocky climb near Timberline Falls make this a challenging hike even though the numbers may not look extreme.
How to Get to Sky Pond Trailhead
Starting From Glacier Gorge
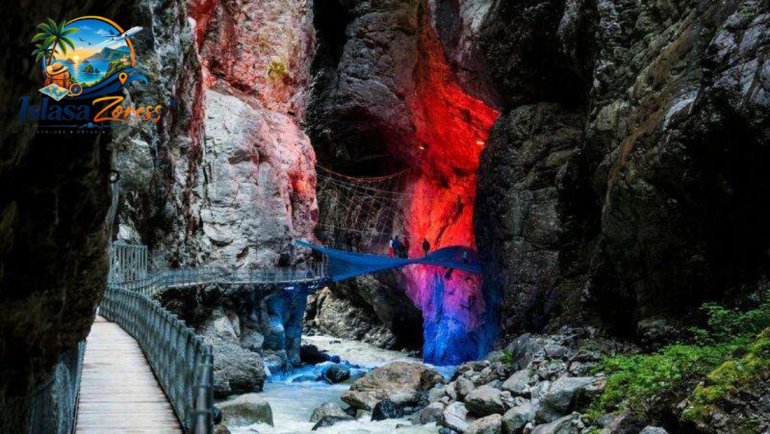
Glacier Gorge is the closest starting point for the Sky Pond hike. From here, follow the signs toward Alberta Falls and continue toward The Loch.
Starting From Bear Lake

You can also start from Bear Lake, but this adds some extra distance to the hike. Follow the trail toward Alberta Falls and continue along the Sky Pond route.
Best Time to Hike Sky Pond Trail
Summer Hiking
Summer is usually the easiest season for hiking Sky Pond because snow and ice are less common on the trail. Start early to avoid afternoon storms and enjoy cooler temperatures.
Early Fall Hiking
Early fall can be a beautiful time to visit, with cooler weather and changing foliage. However, snow and ice can appear at higher elevations, so check conditions before you go.
When to Avoid the Trail
Winter and late spring can bring heavy snow, ice, and difficult trail conditions. Unless you have the right experience and equipment, these seasons are better avoided for Sky Pond.
Sky Pond Trail Parking & Shuttle Information
Parking at Glacier Gorge
Glacier Gorge is the closest starting point for the Sky Pond hike, but its parking area is small and can fill early. Arriving in the morning gives you a better chance of finding a spot.
Parking at Bear Lake
Bear Lake has a larger parking area and is another option for starting the hike. However, starting here adds some extra distance to your route.
Using the Shuttle
During busy periods, Rocky Mountain National Park operates shuttle services in the Bear Lake corridor. If parking is full or restricted, the shuttle can be a convenient way to reach the trail area. Check the park’s current shuttle schedule before your visit.
Sky Pond Trail Safety Tips
Watch Your Step
The trail becomes rocky and uneven as you get closer to Sky Pond. Slow down on steep sections and be especially careful around Timberline Falls.
Check the Weather
Mountain weather can change quickly. Check the forecast before starting and turn back if conditions become unsafe.
Start Early
An early start gives you more daylight and helps you avoid the hottest part of the day and possible afternoon thunderstorms.
Bring Enough Water
The hike is long and strenuous, so carry enough water for the entire trip. Bring extra snacks if you plan to add Lake Haiyaha or other lakes.
Know Your Limits
You do not have to complete every optional detour. If you are tired or conditions become difficult, skip the extra lakes and head back toward the trailhead.
Things to Do in New York City: A Complete Guide for First-Time Visitors
How Much Time Do You Need for Sky Pond Trail?
Standard Sky Pond Hike
Plan for most of the day if you want to hike to Sky Pond and back without rushing. Your pace, breaks, trail conditions, and time spent at the lake will all affect the total time.
Extended Lake Route
Adding Lake Haiyaha and the other alpine lakes makes the day considerably longer. Start early and leave enough daylight for the return journey.
Allow Extra Time
It is better to have extra time than to rush through the hike. Take breaks, enjoy the scenery, and remember that the rocky sections can slow you down.
The Hiking Experience
The Sky Pond hike starts gently, but the trail becomes more demanding as you climb higher. Along the way, you’ll pass through forest, cross small streams, and enjoy mountain views before reaching some of the most scenic spots in Rocky Mountain National Park.
The first major highlight is Alberta Falls, followed by The Loch. After The Loch, the trail becomes steeper and rockier, leading toward Timberline Falls. This is the toughest part of the hike, as you’ll need to scramble over wet and uneven rocks beside the waterfall.
Above Timberline Falls, you’ll reach Lake of Glass. Don’t turn around here—you still have a little farther to go. From the lake, the route continues over a rocky section before opening up to the spectacular views of Sky Pond.
The final stretch is what makes the effort worthwhile. Sky Pond sits high in the mountains beneath dramatic rocky peaks, creating an unforgettable alpine setting. Take your time when you arrive, enjoy the scenery, and rest before starting the descent.
The Trailhead to Alberta Falls
The hike to Sky Pond begins at the Glacier Gorge Trailhead. If you are starting from Bear Lake, you’ll have a slightly longer walk before reaching the main route. Follow the signs toward Alberta Falls, one of the first major sights along the trail.
The trail winds through a peaceful forest with occasional mountain views. Alberta Falls is a great place to pause for a few minutes and enjoy the rushing water before continuing toward The Loch.
The Loch
After Alberta Falls, continue toward Loch Vale and The Loch. This section is generally easier than the climb that comes later, although you will still gain elevation as you move farther into the mountains.
The Loch is a beautiful alpine lake surrounded by steep peaks and forest. It is worth taking a short break here because the scenery gives you a good preview of what is still ahead. Once you leave The Loch, the trail gradually becomes more rocky and challenging.
The Real Climbing Starts
After The Loch, the easy walking comes to an end. The trail becomes steeper as you make your way toward Timberline Falls. You’ll climb over rocky sections and uneven terrain, so take your time and watch your footing.
Timberline Falls is one of the most memorable parts of the hike, but it is also where extra care is needed. The route involves scrambling up rocks beside the waterfall, and the surface can be wet, slippery, or icy depending on conditions. Sturdy footwear and good balance are important here.
Lake of Glass
Once you make it past Timberline Falls, you’ll reach Lake of Glass. The lake is surrounded by rugged mountain scenery and is an excellent place to stop and catch your breath.
Keep in mind that Lake of Glass is not Sky Pond. Many hikers mistake it for the final destination because it is already an impressive alpine lake, but Sky Pond is still farther along the trail.
Sky Pond Trail
From Lake of Glass, the final section takes you across rocky terrain toward Sky Pond. This part can feel a little confusing because the route is less obvious in places, so pay attention to trail markers and follow the path used by other hikers rather than creating your own route.
As you get closer, the landscape opens up and the dramatic rock formations around Sky Pond begin to appear. The lake sits beneath towering peaks and is one of the most spectacular sights on the entire hike.
Once you reach Sky Pond, take some time to enjoy the view. The difficult climb and long approach make the destination feel even more rewarding. Remember that the return journey follows the same challenging sections, so save enough energy for the trip back.
Sky Pond
Sky Pond is the highlight of the hike and one of the most beautiful alpine lakes in Rocky Mountain National Park. The lake sits at about 10,900 feet, surrounded by rugged cliffs, sharp mountain peaks, and a series of striking rock formations.
After the demanding climb to reach it, the peaceful setting makes a great place to rest and take in the scenery. The water can look different depending on the weather and season, from deep blue to greenish shades.
Give yourself some time at the lake rather than rushing back as soon as you arrive. Find a safe spot away from the edge, have a snack, and enjoy the mountain views. The area around Sky Pond is exposed, so keep an eye on changing weather and avoid getting too close to unstable rocks.
When you are ready to leave, remember that the difficult parts of the route are still ahead in reverse. The descent beside Timberline Falls can be particularly tricky, so take it slowly and use extra caution on wet or slippery rocks.
The Descent
Once you’ve enjoyed Sky Pond, the return trip takes you back along the same route. The descent can be just as demanding as the climb, especially around Timberline Falls.
Take your time on the rocky sections and use your hands where needed. If the rocks are wet or icy, slow down even more and give other hikers enough space. Once you are past the waterfall, the trail becomes easier as you head back toward The Loch and Alberta Falls.
If you are adding the extra lakes to your hike, this is where your route can change. Make sure you still have enough daylight, water, and energy before continuing.
Optional: Mills Lake Detour
Mills Lake is a beautiful optional stop if you want to add another alpine lake to your hiking day. The trail branches from the Glacier Gorge area and leads through forest and mountain scenery before reaching the lake.

Mills Lake adds significant distance to an already challenging hike, so it is best for hikers who have plenty of time and energy. If Sky Pond is your main goal, skipping this detour can help you save energy for the return journey.
Lake Haiyaha
Lake Haiyaha is another beautiful alpine lake that can be added to your day. Its turquoise-colored water and large surrounding boulders give it a very different feel from Sky Pond.
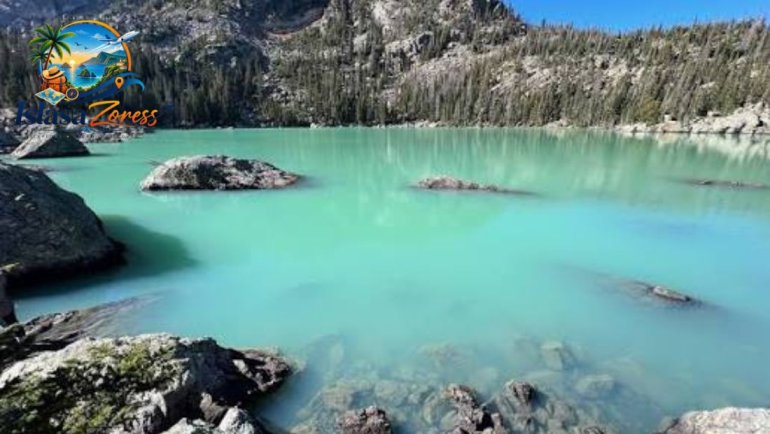
The route to Lake Haiyaha includes rocky and uneven sections, so don’t expect an easy walk even after completing Sky Pond. You’ll need to climb and scramble over some rocks near the lake, but the scenery makes the extra effort worthwhile.
Because this addition makes an already long hike even longer, check your time and energy before committing to it.
Emerald Lake
Emerald Lake is one of the popular lakes in the Bear Lake area and can be included as part of a longer lake-hopping day. The lake sits below dramatic mountain peaks and is especially scenic when the water is calm.
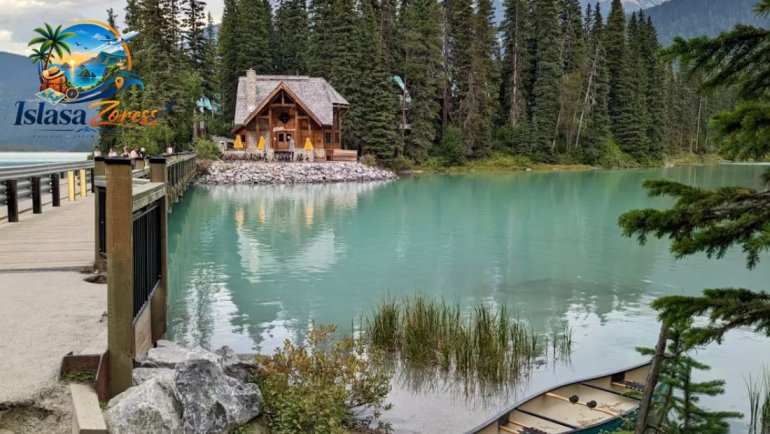
The final approach is relatively short compared with the Sky Pond section, but the area can be busy. If you are tired after the longer portions of the hike, you can choose to skip this stop and continue toward the trailhead.
Dream Lake
Dream Lake is another scenic stop near Emerald Lake. The lake is surrounded by rugged peaks and offers beautiful views without requiring the long approach of Sky Pond.
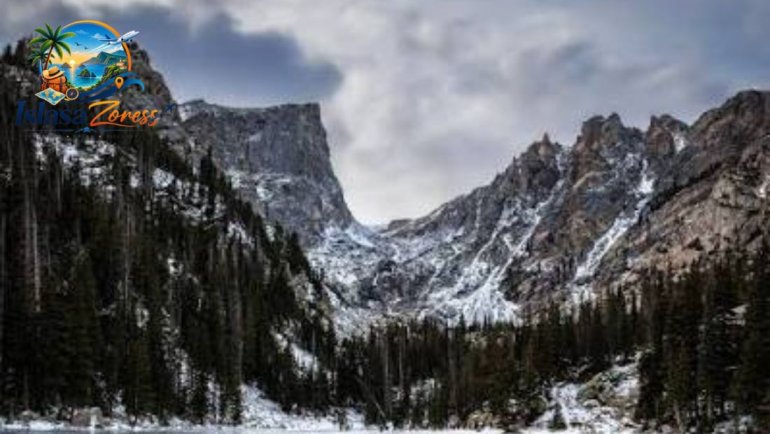
Because it is part of the popular Bear Lake corridor, expect more hikers here, particularly during summer. If you are completing the extended route, it makes a nice place to slow down and enjoy the scenery before continuing.
Nymph Lake
Nymph Lake is a smaller alpine lake located along the route between Bear Lake and the higher lakes. It is surrounded by forest and mountain views, making it a pleasant stop along the way.

It does not have the dramatic scale of Sky Pond, but its location makes it easy to include if you are already exploring the Bear Lake area.
Bear Lake
Bear Lake is the final stop on this extended route and one of the easiest lakes to visit in Rocky Mountain National Park. The trail around the lake is short and relatively accessible compared with the demanding Sky Pond hike.
The lake is surrounded by mountains and forest, making it a beautiful place to finish your day. If you started your hike from Bear Lake, this is also where you’ll return to the parking area.
Bear Lake is popular throughout the day, so don’t be surprised to see plenty of other visitors here. After hiking the longer Sky Pond route, reaching Bear Lake can feel like a relaxing end to a very full day.
Sky Pond vs. Lake Haiyaha: Which Should You Hike?
Choose Sky Pond for the Classic Hike
Sky Pond is the better choice if you want a challenging hike with waterfalls, multiple alpine lakes, and dramatic mountain scenery. It is the main destination and offers a rewarding experience for hikers who are prepared for the rocky climb.
Choose Lake Haiyaha for a Shorter Adventure
Lake Haiyaha is a good option if you want a beautiful alpine lake without committing to the full Sky Pond route. Its turquoise water and large boulders make it especially scenic.
Can You Hike Both?
Yes, if you have enough time, energy, and good weather. Adding Lake Haiyaha to your Sky Pond day creates a longer adventure, so start early and be realistic about your hiking ability.
The Takeaway: Is Sky Pond Trail Worth Doing?
Yes, Sky Pond Trail is absolutely worth doing if you are prepared for a challenging mountain hike. The route combines waterfalls, alpine lakes, rocky peaks, and some of the best scenery in Rocky Mountain National Park.
The climb near Timberline Falls is the toughest part, and the full hike can take several hours. However, the views at Sky Pond make the effort worthwhile. If you want a shorter day, you can skip the optional lake additions and focus only on the main Sky Pond route.
For experienced or reasonably fit hikers who are comfortable with rocky and steep terrain, Sky Pond is a memorable hike and a great way to experience the beauty of Rocky Mountain National Park.
Conclusion
Sky Pond Trail is a challenging hike, but it offers an incredible experience from start to finish. From Alberta Falls and The Loch to Lake of Glass and the dramatic scenery around Sky Pond, there is something beautiful to see throughout the route.
If you have extra time and energy, adding Lake Haiyaha, Emerald Lake, Dream Lake, Nymph Lake, or Mills Lake can turn the day into an even bigger alpine adventure. Just remember that these additions make an already demanding hike longer.
With an early start, proper footwear, enough water, and a little preparation for changing mountain weather, you can enjoy Sky Pond safely and make the most of your time in Rocky Mountain National Park.
FAQ: Sky Pond Hike
When is the best time to hike Sky Pond?
Summer is the best time, while early fall can also offer good conditions. Always check the weather and trail conditions before going.
How difficult is Sky Pond Trail?
It is a challenging hike with steep sections, rocky terrain, and a scramble near Timberline Falls.
How long is the Sky Pond hike?
The standard hike is about 9–10 miles round trip, depending on your starting point.
How long does it take to hike Sky Pond?
Most hikers should allow several hours for the round trip, including breaks and time at the lake.
Can beginners hike Sky Pond?
It is not the best choice for complete beginners because of the elevation, distance, and rocky sections.
Are dogs allowed on Sky Pond Trail?
No. Dogs are not allowed on hiking trails in Rocky Mountain National Park.
Can you add Lake Haiyaha to the hike?
Yes. Lake Haiyaha can be added for a longer adventure, but it adds extra distance and rocky terrain.
Is Emerald Lake worth visiting?
Yes, especially if you have enough time and energy. It is a beautiful addition to the longer lake route.
What should you bring to Sky Pond?
Bring plenty of water, snacks, sturdy hiking shoes, layers, sun protection, and rain gear. Traction gear may be needed in icy conditions.
Do you need a reservation for Sky Pond?
Yes, a timed-entry reservation may be required during the peak season. Check the latest Rocky Mountain National Park rules before your hike.
You may also like: Las Vegas Travel Guide: The Best Things to See and Do in Sin City






One Comment